This is the restoration page for a 1960 Star Sapphire.
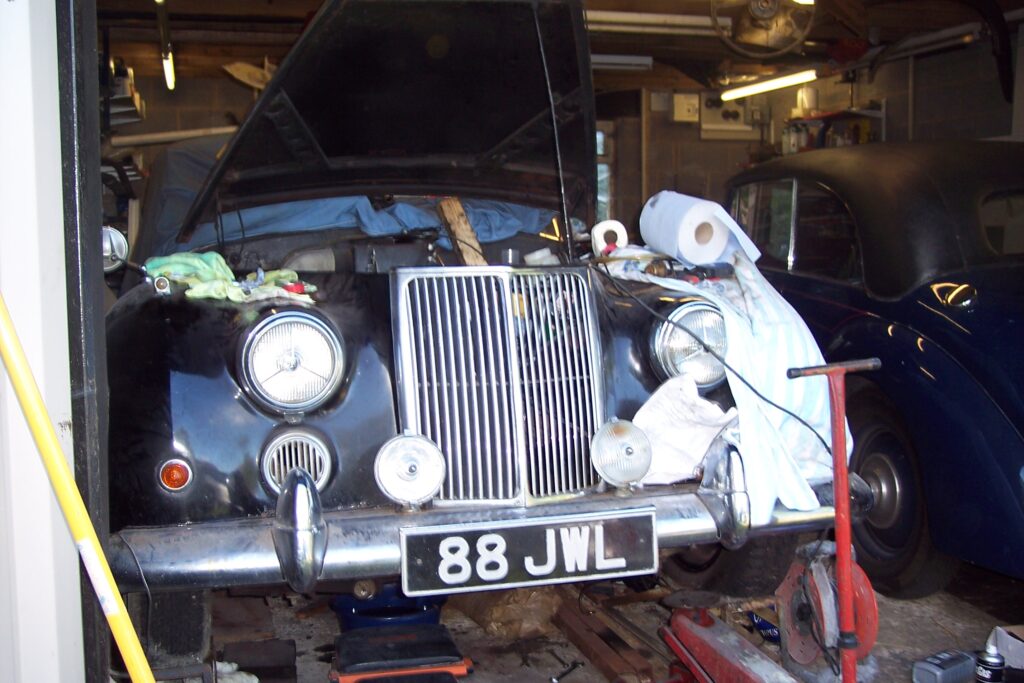
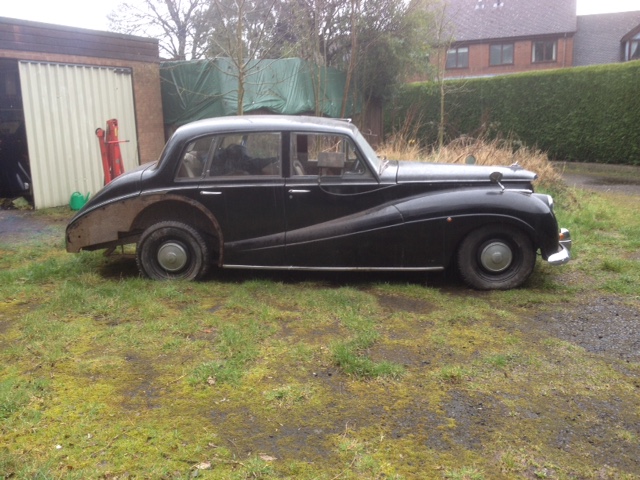
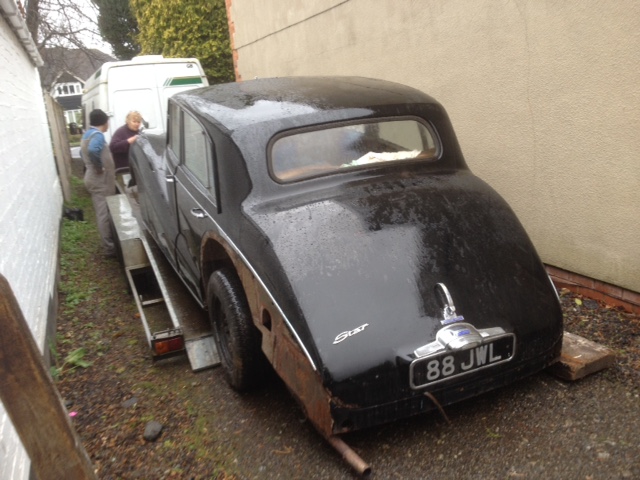
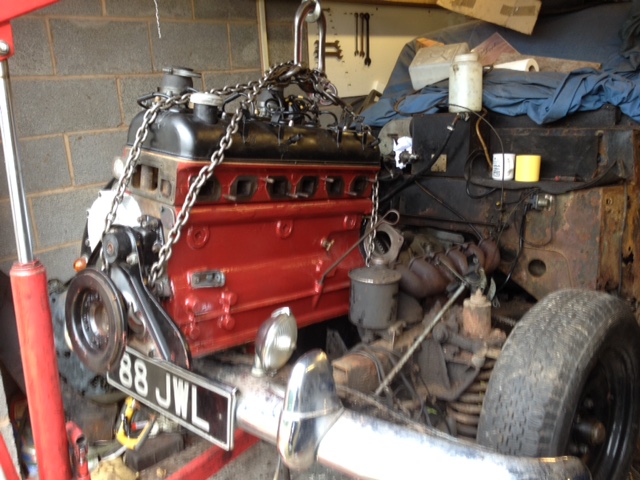
This car was purchased new from Vincents of Reading, Armstrong Siddeley distributors, by Sandhill Quarries Ltd of Headington, Oxford. It was registered on 31 May 1960 and retains its original registration number 88 JWL. The car seems to have been purchased for use by a director of the company, Leslie Bursill, whose signature for Sandhill Quarries Ltd is on the log book and who retained the car when there was a transfer of ownership in 1963 to Selbur (Investments) Ltd and then to Leslie Bursill himself in 1968. No other change of ownership is recorded on the log book and when registration records were computerised in 1983 the recorded owner on the Vehicle Registration Document was a car dealership, Humphris (Oxford) Ltd. The car appears to have been traded in to the dealership (in exchange for a new Nissan car …) and to have languished for a number of years in the corner of a basement below the car dealership before it was bought towards the end of 1989 by Richard Pratt, a Formula One stock car racer. The car was not bought for stock car racing (obviously …) but with a view to being sold on for a profit to fund stock car racing. Contact was made by Richard Pratt with the Armstrong Siddeley Owners Club (ASOC) with a view to obtaining an indication of the car’s value and this led to John Pinner, an ASOC member, going to view the (low mileage) car and purchasing it from Richard Pratt in February 1990. (Richard, incidentally, played a decisive part in the outcome of the 1991 Formula One Stock Car Racing World Final, which can be seen on YouTube – on the last bend Peter Falding overtook long-time leader Bert Finnikin, only to be spectacularly taken out by Richard Pratt, allowing third placed John Lund to drive serenely through to win the race!) Having acquired the car, John got it back on the road with an MOT in June 1990 (mileage 28,868) and took the car to Holland later that year. Although roadworthy, the car had reached the point where it needed some restoration work, which John began the following year when the MOT expired. Some significant repair work on the inner rear wings, to a high standard, was completed but other projects, notably the purchase by John of a Siddeley Special, prevented the Star restoration from proceeding further. The Star remained in John’s garage until his death in 2015 and I purchased the car from John’s son Rob in 2016. The first restoration work done on the car was an engine rebuild, expertly undertaken by Rob (with limited assistance from me …) before I took delivery of the car in March 2017. Although a low mileage car with a recorded mileage of only 31,501, the engine was seized solid, could not be freed and a full rebuild was needed. The photos below show the Star in John’s garage (next to Rob’s Typhoon), the Star outside the garage after refitting the rebuilt engine, and the Star on a trailer ready to leave and spend some time in my garage.
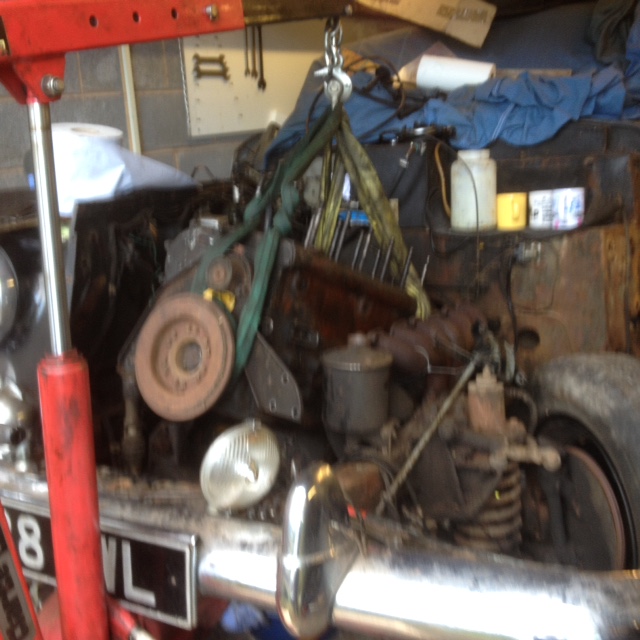
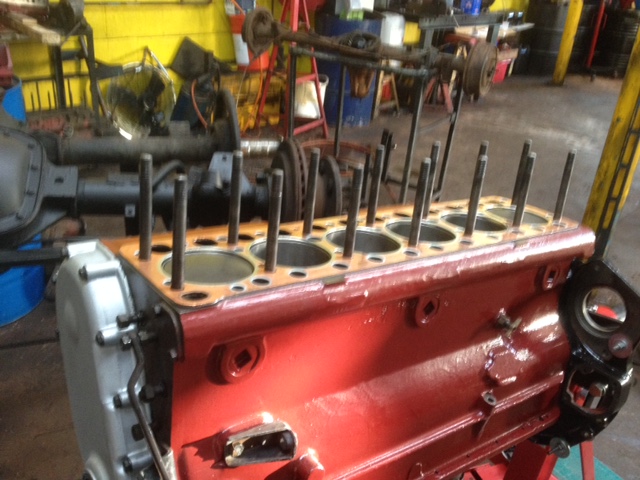
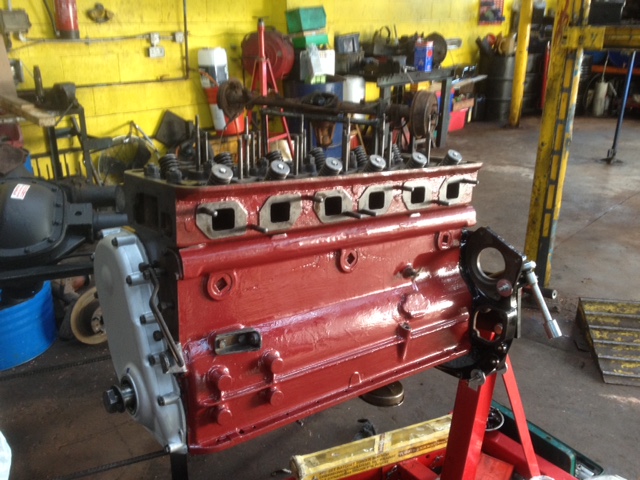
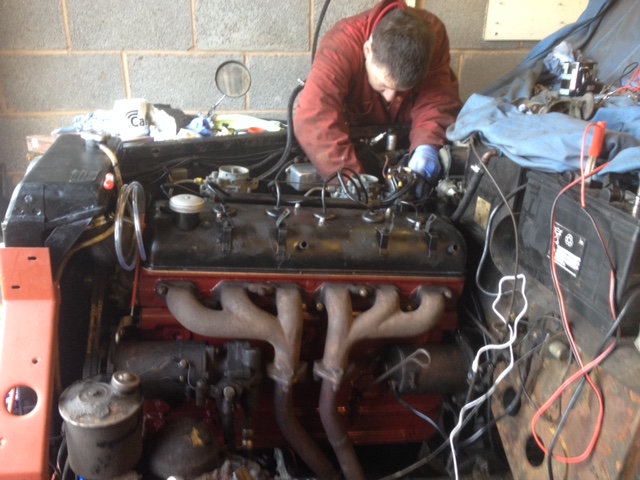
The first restoration work done, as indicated, was removal and dismantling of the engine, having the necessary machining work done, and rebuilding the engine. The machining work included a crankshaft regrind and crack test; a rebore to accept liners followed by a rebore to standard bore size; refacing of both the block and cylinder head; recutting of the valves and valve seats and a pressure test of the cylinder head. The engine was then rebuilt with new standard size pistons; new 0.10″ oversize big end and main bearings; and a new cylinder head gasket. A new timing chain and auto adjuster were fitted; new gaskets for ancillaries and a new front engine mounting. The photos below show the engine (and gearbox) being removed from the car; the rebuilt and painted block awaiting refitting of the cylinder head; the cylinder head refitted; the completed engine being refitted to the car; and the ancillaries all refitted with Rob Pinner setting the distributor points prior to firing up the engine.
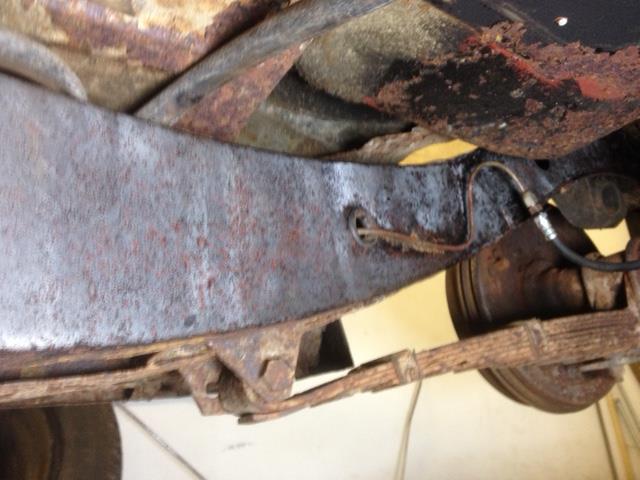
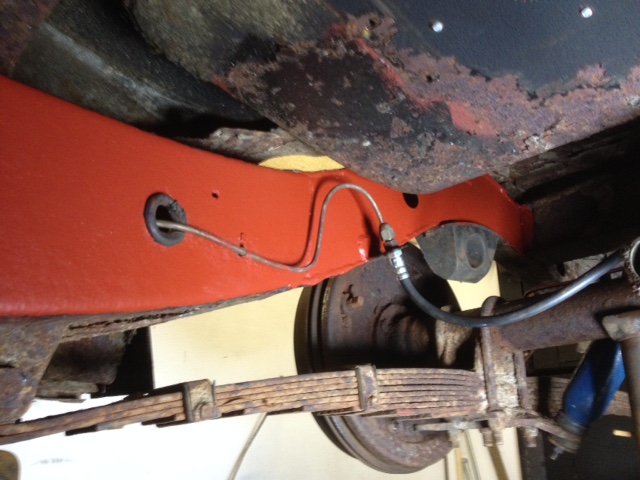
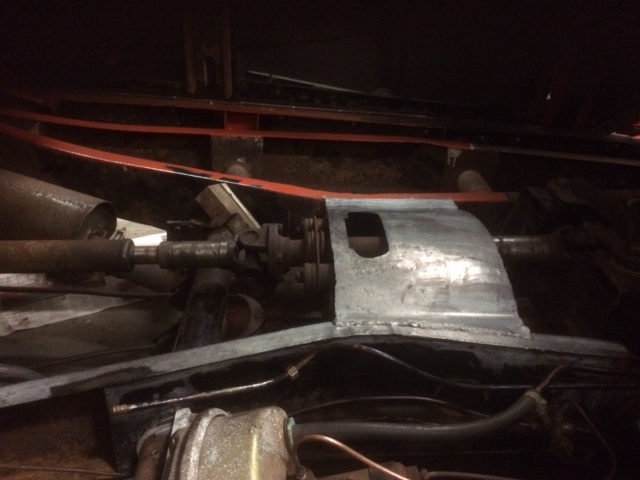
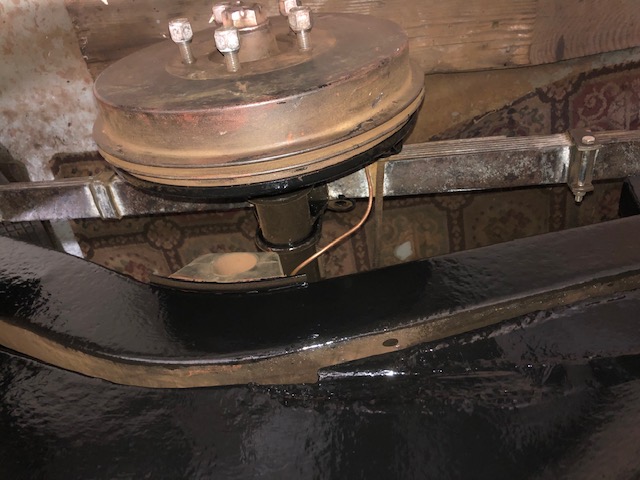
As the car would now run and move, the next step was to get it to stop. The rear wheel cylinders, which looked as new and were in very good condition, were easily freed off and rebuilt with new seals. The servo seemed to function satisfactorily so was left untouched. The front discs seemed to be ok once the surface rust was removed (although they have yet to be road tested) but the calipers needed professional refurbishment and new pistons fitting. A new master cylinder and new brake hoses, along with some new pipework, were also fitted. As the pipework from the rear hose going forward went through the inner chassis rail, the opportunity was taken to de-rust and paint this area of the chassis before fitting the pipework and hose. As much rust was removed as possible, using mechanical means (e.g. polycarbonate surface preparation wheel, wire brushes, burrs) and then chemical means (Jenolite Rust Remover followed by coarse wire wool). This area of the chassis was then painted with 3 coats of Bondaprimer followed by a coat of black tekaloid paint to finish. The photos below show this area of the chassis in bare metal with rust removed and when coated with Bondaprimer.
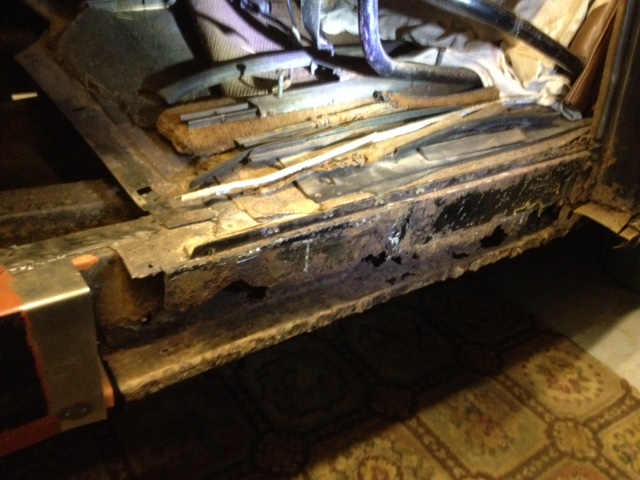
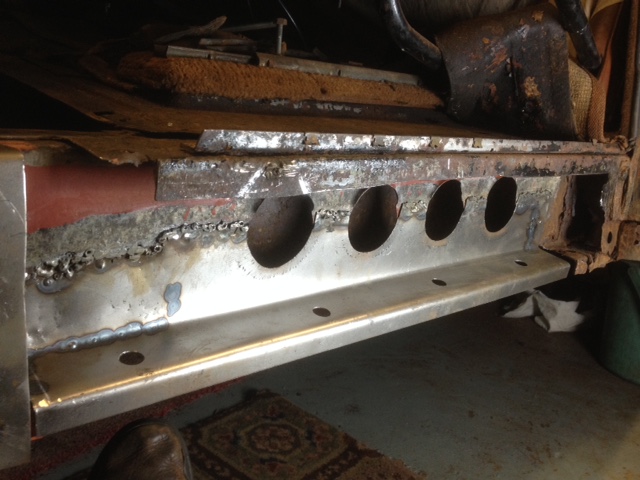
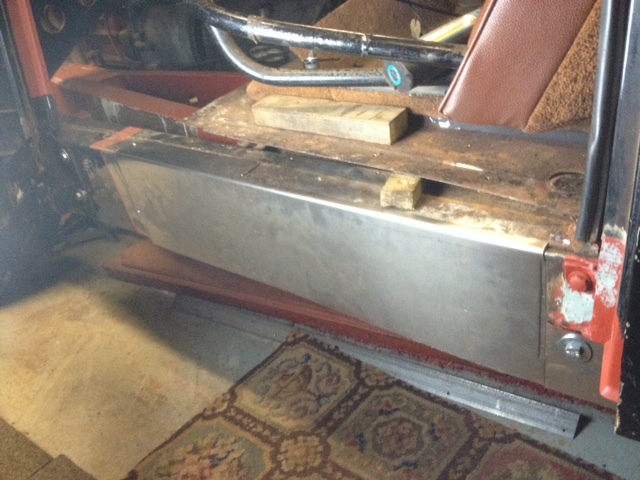
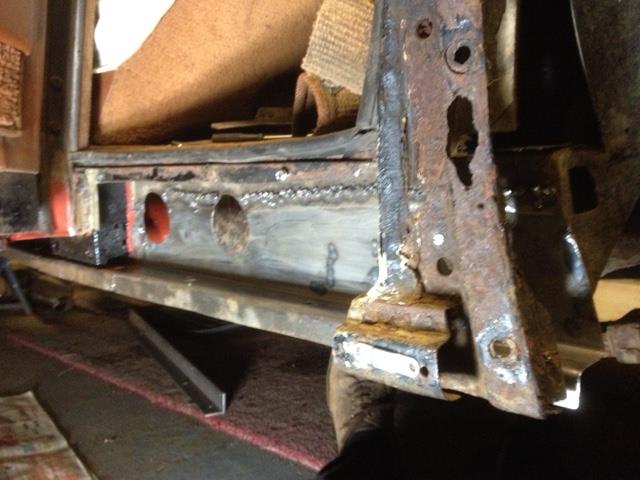
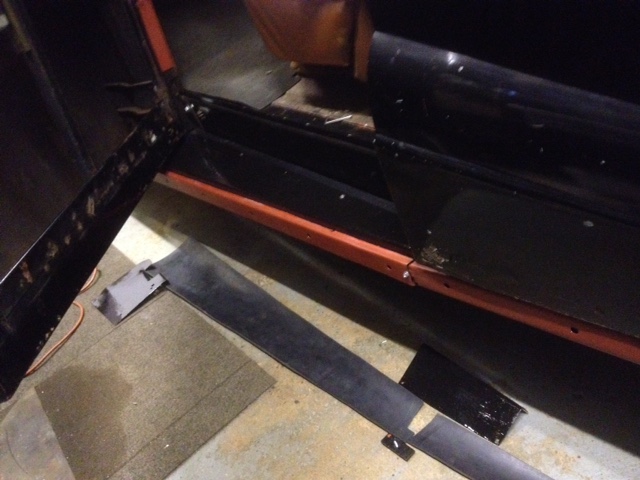
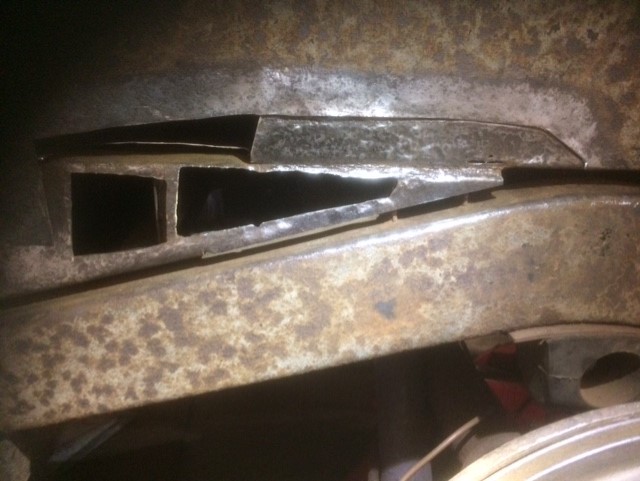
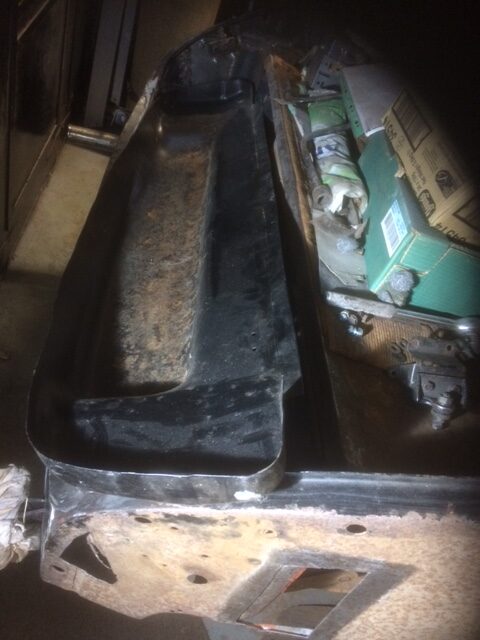
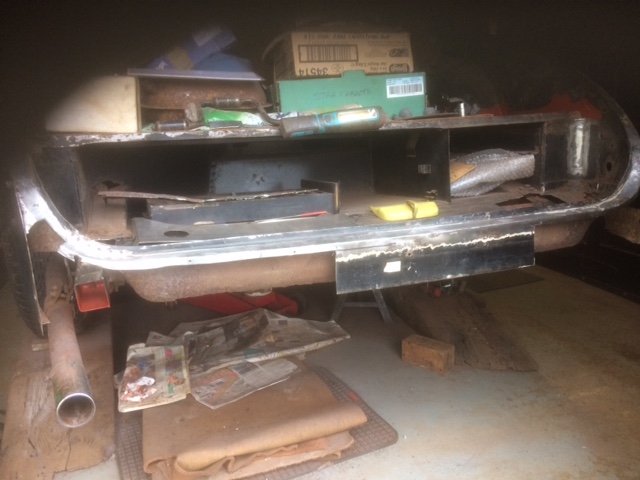
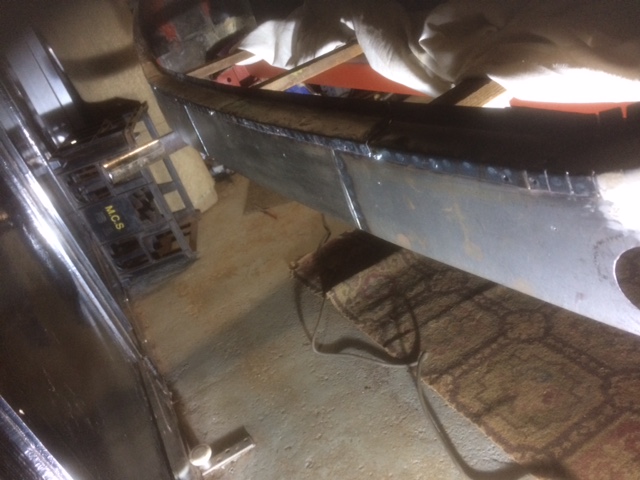
The next task was repairs to the main body sills which support the body and are mounted on the outer edge of the chassis. These needed extensive repairs. For the most part, there was good metal on the flat top section of the sill and the top half of the vertical inner face but repair sections were needed for the lower half of the inner face and the bottom flat section, as well as a complete vertical outer face. The first photo below shows the near side sill section by the passenger door when the (horizontal) step sill riveted to the outer face of the sill, or what was left of it, was removed. The second photo shows the repaired inner face with new sill bottom and lip prior to fitting a new outer face. The third photo shows a trial fit of the outer face. The fourth photo (taken before fitment of the sill outer face) shows a trial fit of the new step sill, a heavy item which came with the car. The original step sills (I think) had a vertical lip at the top and were pop riveted at three inch intervals to the outer face of the sill.

It can be seen on the left of the photos above that the outer face has already been fitted to the repaired front sections of the sill around and in front of the A post. The repairs here can be seen in the photos below.
For the sake of completeness, here are photos of the repairs to the rear section of the sill. The first shows repairs to the inner face of the sill behind the B Post mounting box and the second shows the repaired inner face from that point backwards.

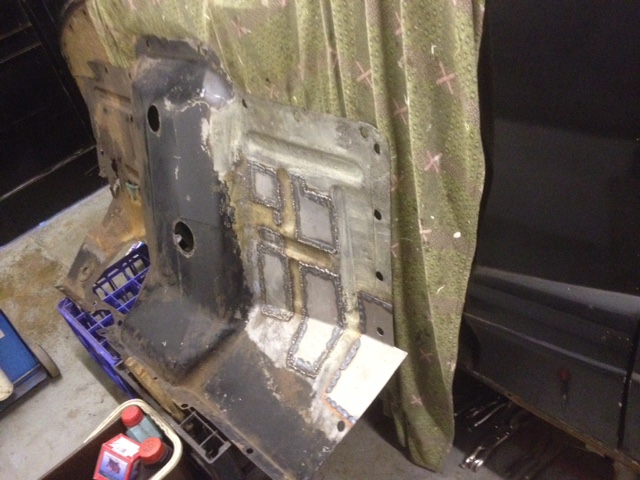
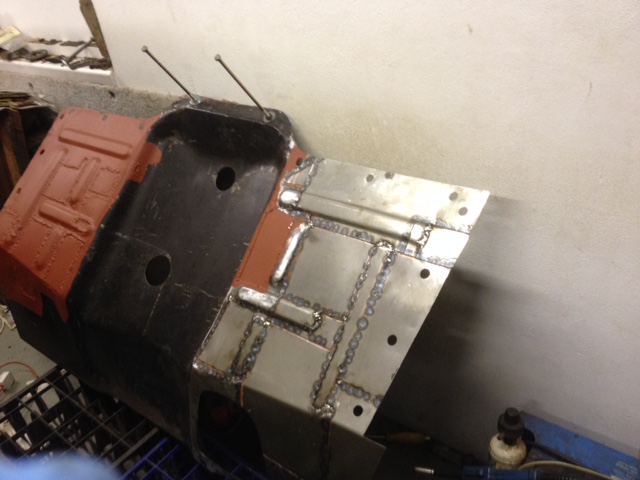
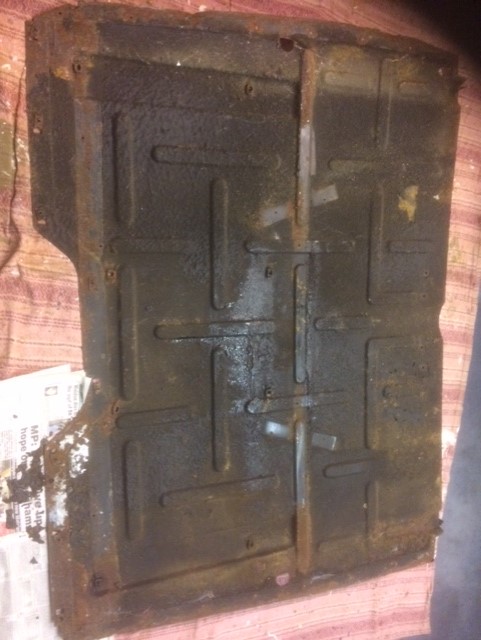
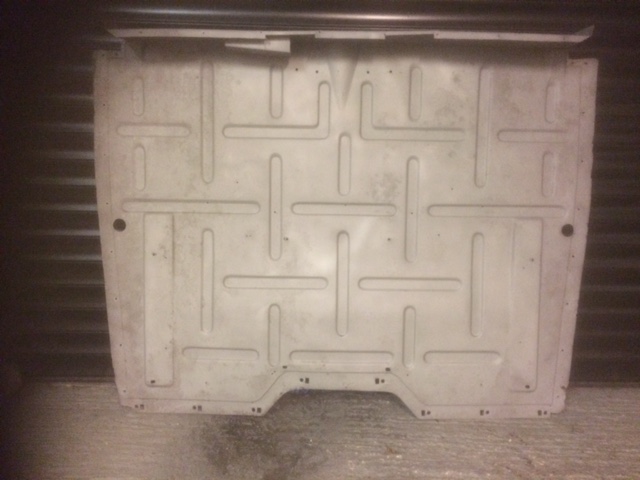
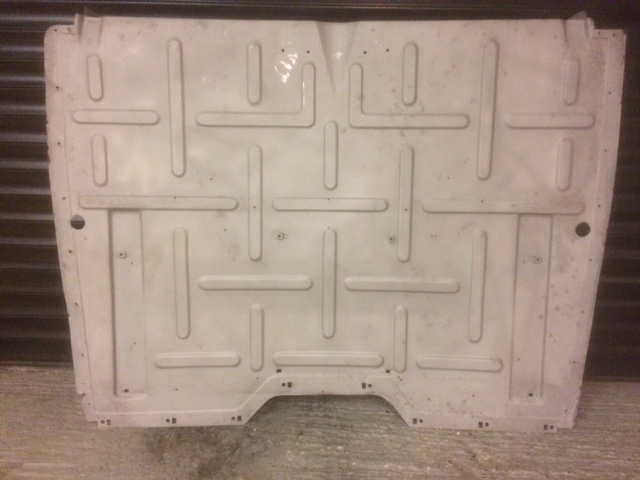
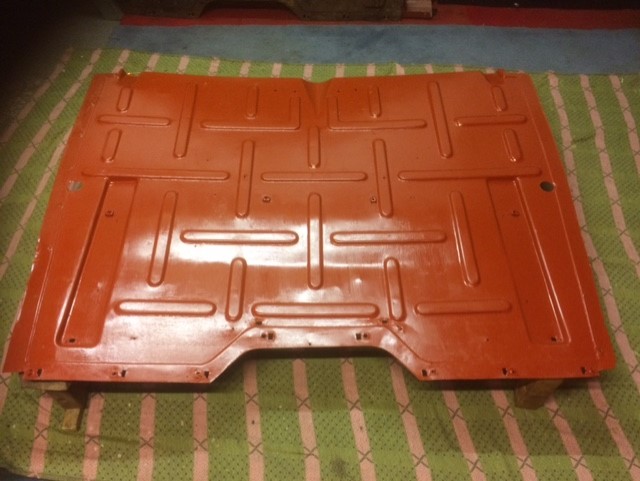
Work on the repaired near side body sill was completed by the end of 2017. Before moving onto the off side body sill, repairs were made to the front floor pressing which had been removed from the car to make the sill repairs. Several repair sections needed to be welded in, particularly on the off side which had had an aluminium plate riveted over the holes in the driver’s footwell. The first photo below shows the nearside repairs and the second photo the off side repairs before painting.
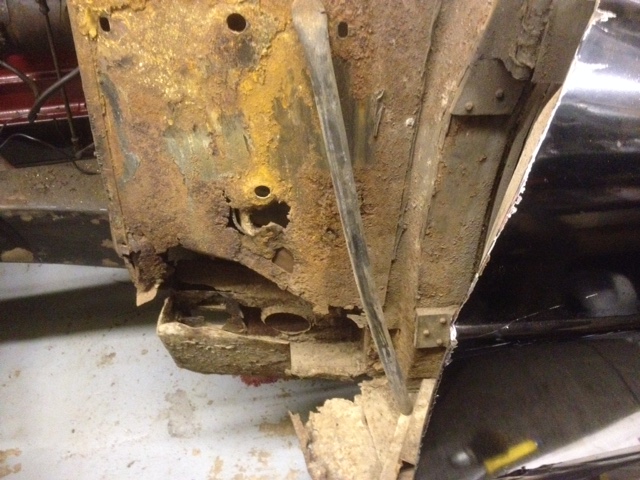
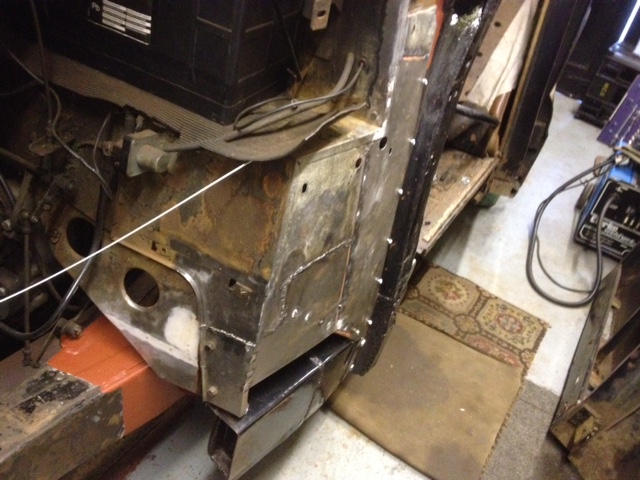
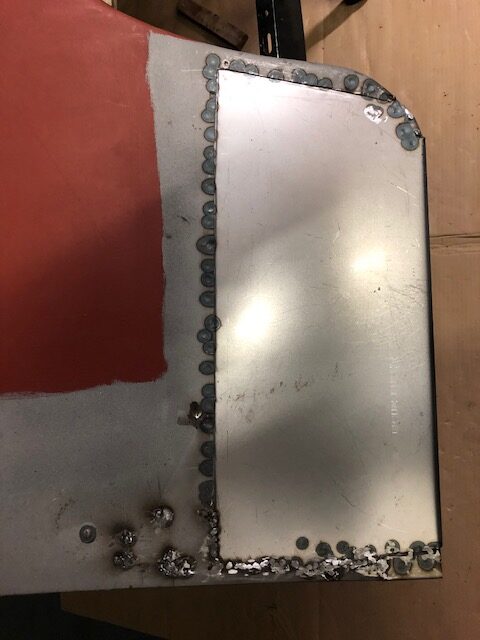
The near side C Post was in poor condition, particularly at the bottom where it meets the sill. The car came with new near side and off side C Post panels and the near side C Post was replaced. The top section where the door striker plate fits was retained and the whole of the curved section below was cut out and replaced, as seen in the photos below.
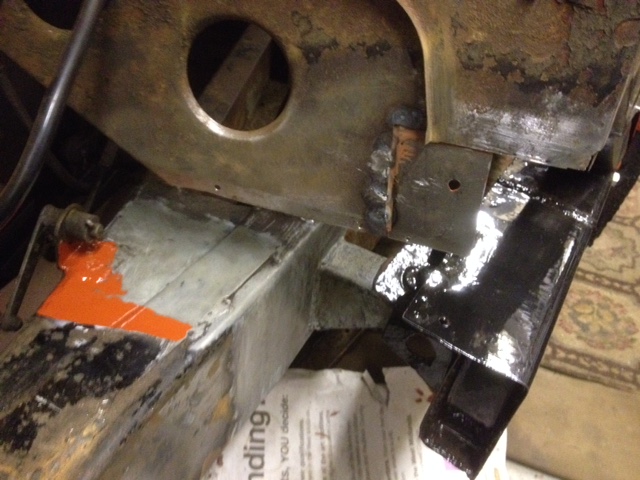
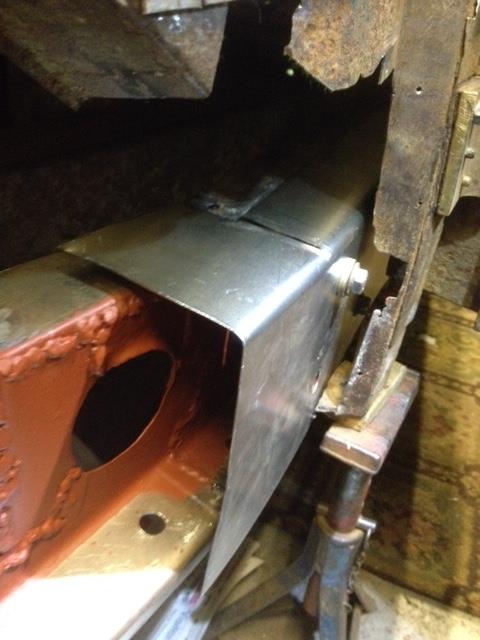
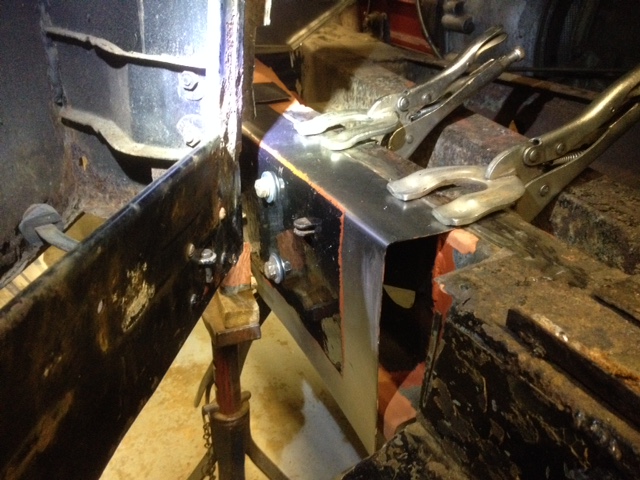
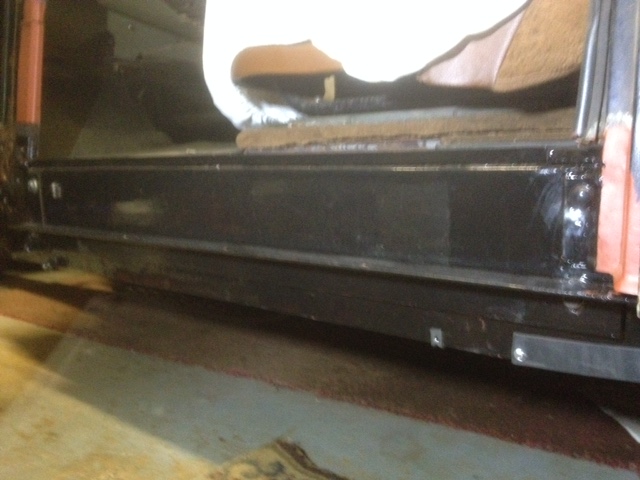
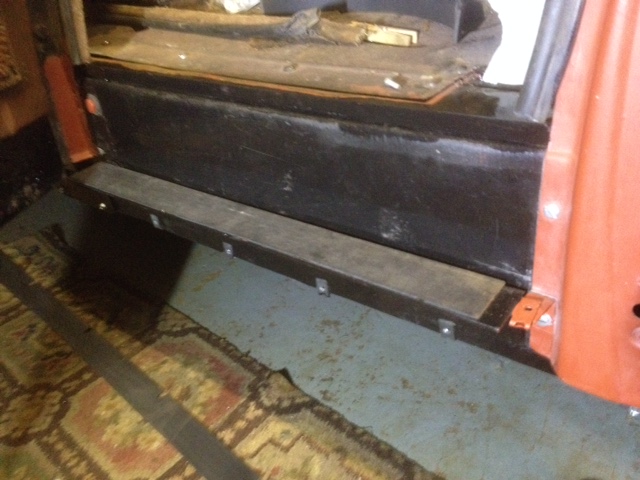
The floor pressing and C post repairs were completed between January and April 2018. The next step was deciding how to fit the near side front and rear step sills. The originals, so far as I could tell, appeared to have been riveted at the top (at three inch intervals) onto the outer sill face about half way up and riveted at the bottom to the main body sill flange. The car came with new replacement step sills but these had no vertical mounting flange at the top for fixing to the outer sill face. In addition, they seemed to be much heavier than the original sills. I decided that I wanted to attach the step sills in a way so that they could easily be removed, particularly if adjustment was needed, and so that there was adequate support for the heaviness of the step sills. This was particularly important for the front door step sills which are longer and wider than the rear door step sills. The solution I came up with for the front doors was to fit a section of 3mm thick angle iron mounted between the A and B posts using the bottom bolt where the A and B posts are fastened to the outer face of the body sill. The horizontal section of the angle iron on which the top face of the step sill would rest was drilled and tapped so that the step sill could be screwed onto the angle iron to hold it in place. A similar piece of angle iron was used for the rear step sill. This was mounted at the front using the bottom bolt on the B post and at the rear with a bolt head large self-tapping acme screw in a hole drilled into the outer face of the body sill. The photos show the front door angle iron bolted onto the A and B posts, the rear door angle iron bolted onto the B post and screwed to the body sill outer face, and the front and rear step sills screwed onto the angle iron (screws visible on front step sill where the door is open but not on rear step sill due to the rear door being shut). Given the width of the front step sill by the A post, additional support was needed to prevent a tendency of the sill to sag at its outer edge at this point. A strong L shaped bracket fastened to the bottom A Post bolt provided the necessary degree of horizontal support. A Ford Cortina Mk3 front bumper bracket proved ideal for this purpose!
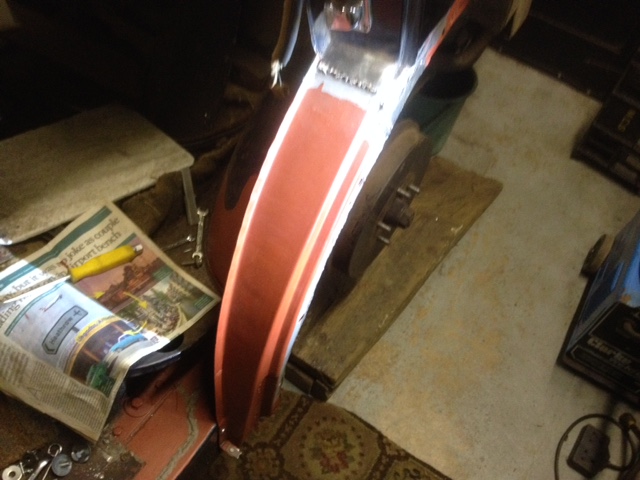
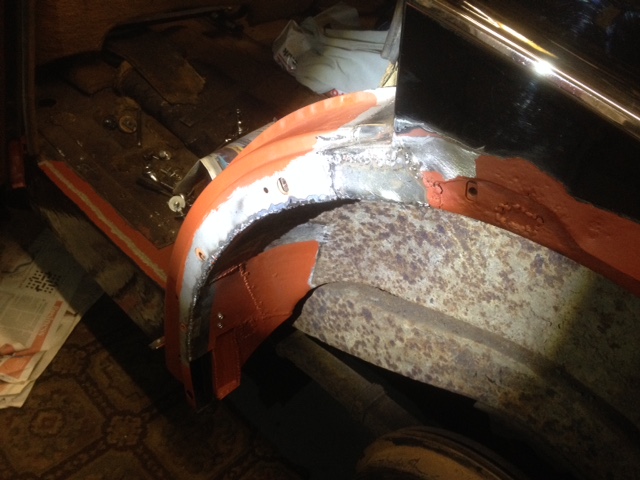
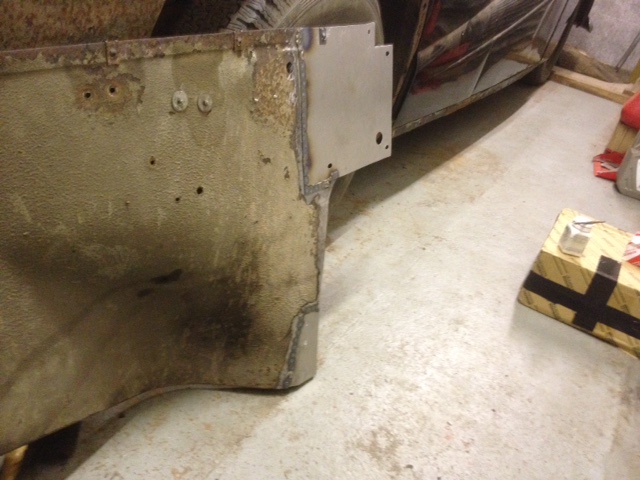
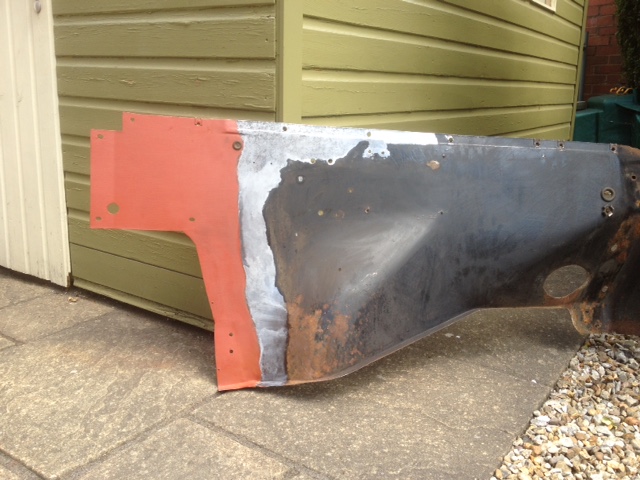
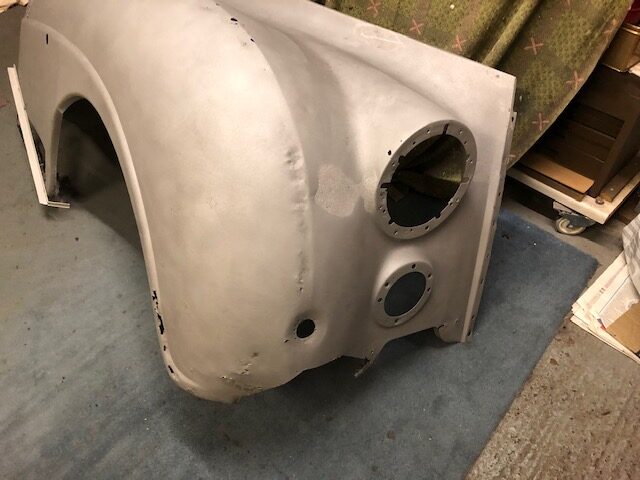
The near side step sill fitments were completed in May and June 2018. The two remaining items needing repairs on the inner body shell on the near side were the inner front wing and the bulkhead area where the battery is located. As regards the inner front wing, the rear section is particularly prone to rot as it is fastened onto the flitch plate, the vertical section at the side of the footwell, and water gets trapped between the two with the inevitable consequence of severe rusting to both the rear section and the flitch plate. When repairing the inner wings on my Sapphire 346 in the 1990s, I replaced the whole of the rear section so that the wing was as it was originally but made sure that there was sufficient clearance between the rear section and the flitch plate so that water could run down without being trapped, using two vertical 3mm thick rubber strips to provide the clearance. This has worked well but I decided this time to significantly reduce the area of overlap by altering the profile of the rear section of the inner wing. Instead of a straight edge down the rear of the wing so that it covers all of the flitch plate, the repair sections were cut so that there was only an overlap at the top and front edge of the flitch plate to enable the wing to be fastened to the flitch plate. This can be seen in the photos below.
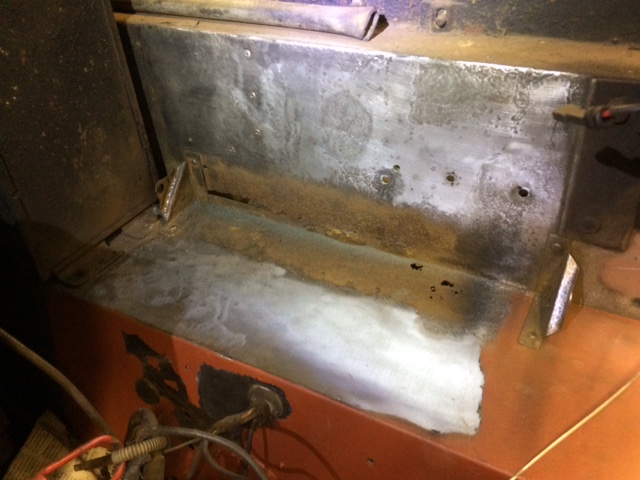
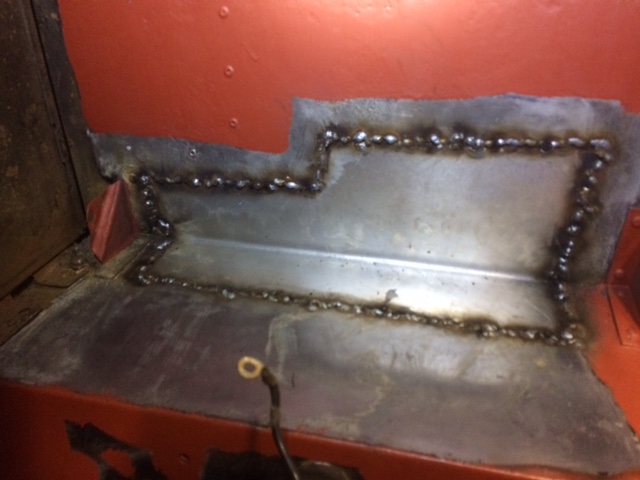
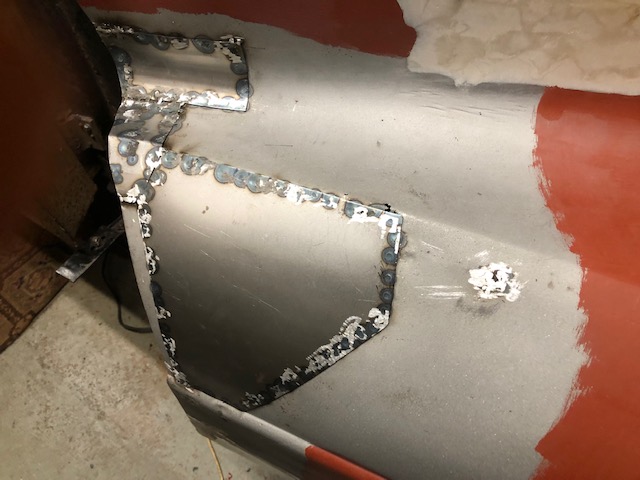
As regards the bulkhead behind the battery, there were holes both at the bottom of the vertical section and the back of the horizontal section and a repair section was needed to replace the metal here. The photos show the holes and the welded in repair section.
The rear wing and bulkhead repairs were completed in July and August 2018.
Repair work similar to that undertaken on the near side of the car was carried out to the off side over the September 2018 to October 2019 period, with periodic breaks to undertake other tasks e.g. making replacement front doorcards. This was followed by removal of the rear floor pressing, sandblasting of the pressing and repainting.
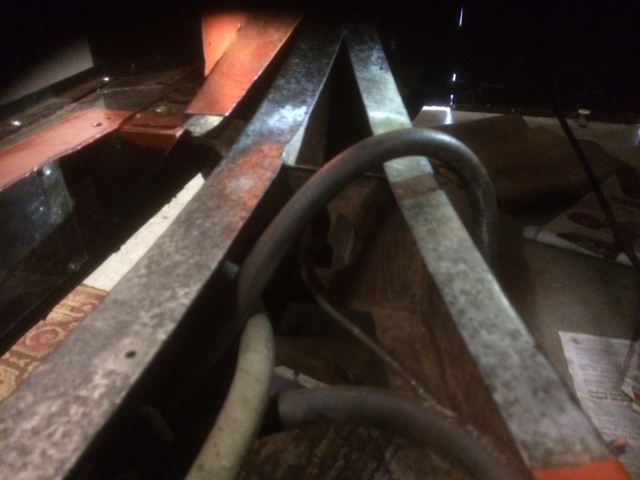
Moving into 2020, with both the front and rear floor pressings removed, the chassis sections beneath the floors could be properly derusted and painted. The photos below show some areas derusted, some areas still awaiting derusting, and some areas painted following derusting.

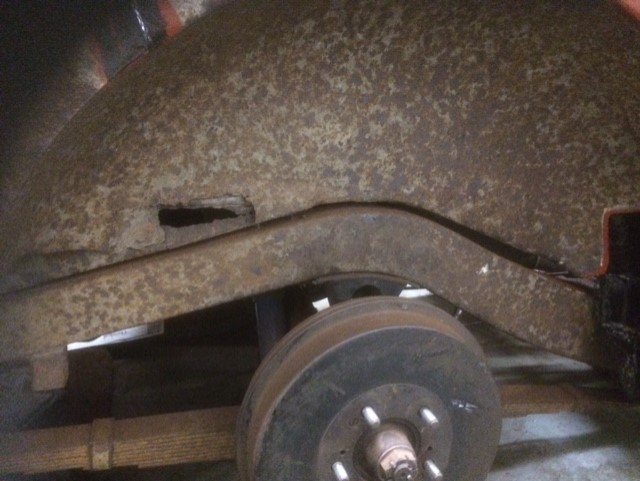
Various repairs were needed in other areas. These included the rear wheelarches; the lower boot floor which was completely removed and replaced with a new panel (which came with the car); and the rear valance, most of which needed replacing. Here are some photos from the off side rear wheelarch.

Here are some photos of the lower boot floor and the rear valance.


The middle photo above shows a trial fit of the new lower boot section and the edge overlapping the off side inner rear wing/boot side shows that it cannot be fitted as a single panel. Presumably, when assembled at the factory, the section was attached as a single panel before the inner rear wings/boot sides were fitted. Once these are in place, it cannot then be fitted as a single panel. The solution was to cut off the off side corner of the panel (making the cut past the edge of the trough), fit the two parts separately and then weld the join. The new panel was sandblasted prior to cutting and fitting to remove the areas of rust that can be seen in the trough section of the panel.
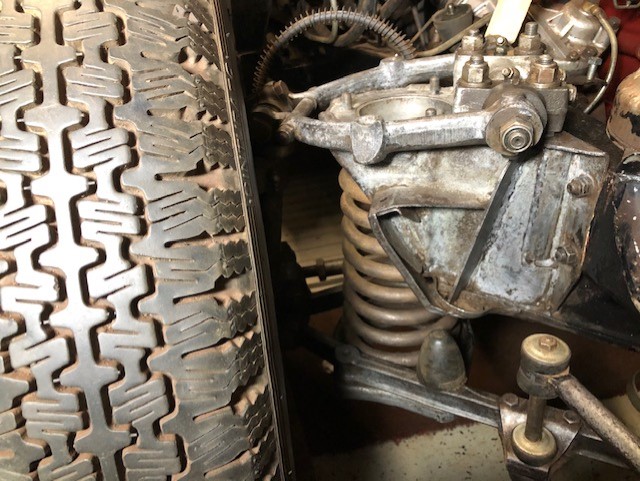
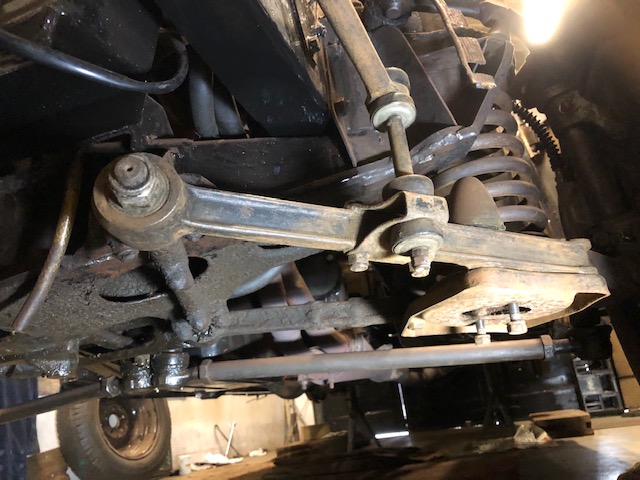
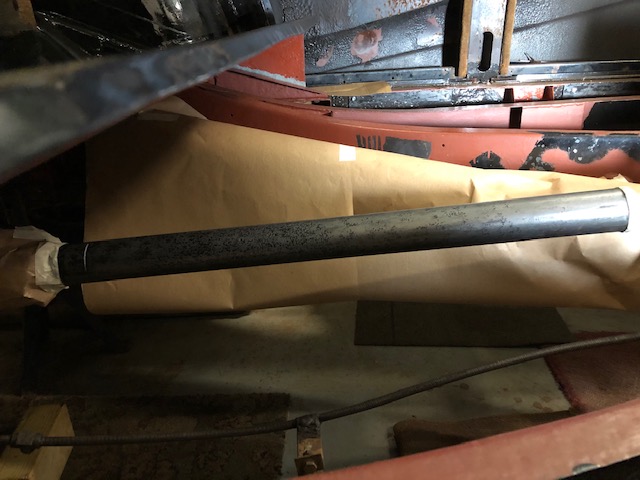
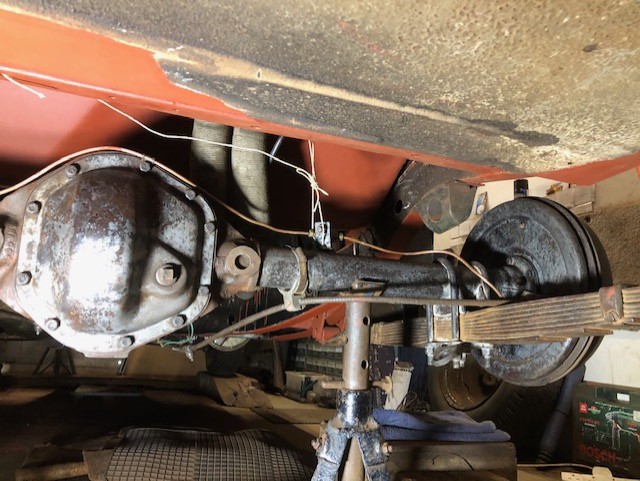
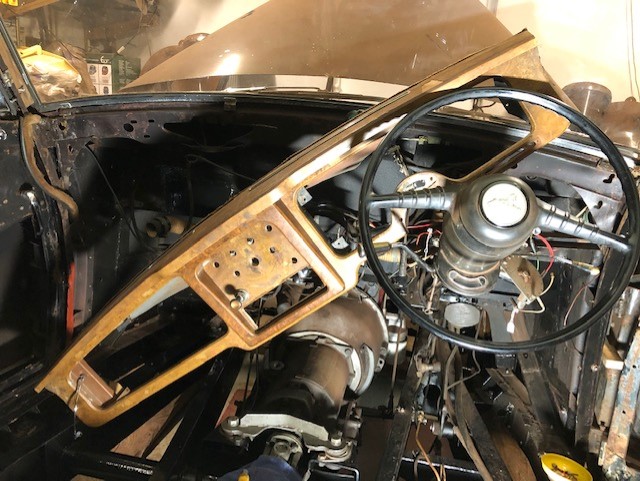
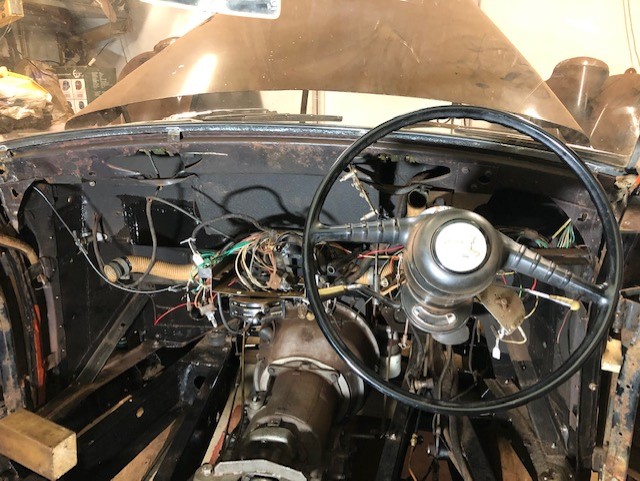
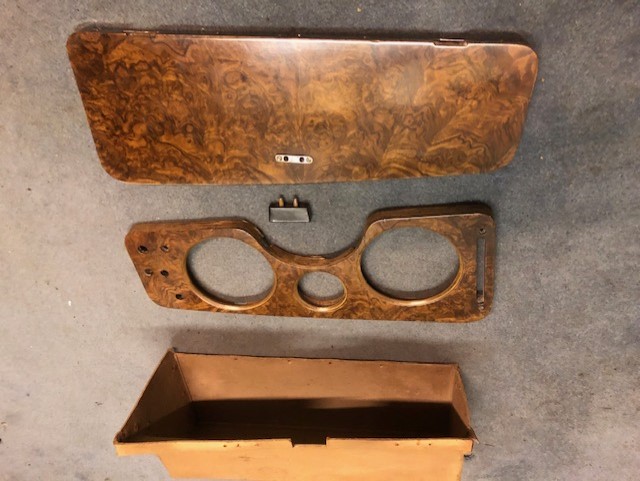
Other work done in 2020 included cleaning up and derusting both the front and rear suspension, prop shaft and rear axle, and removing the instrument panel and dashboard for renovation (repair, re-veneering and re-varnishing).

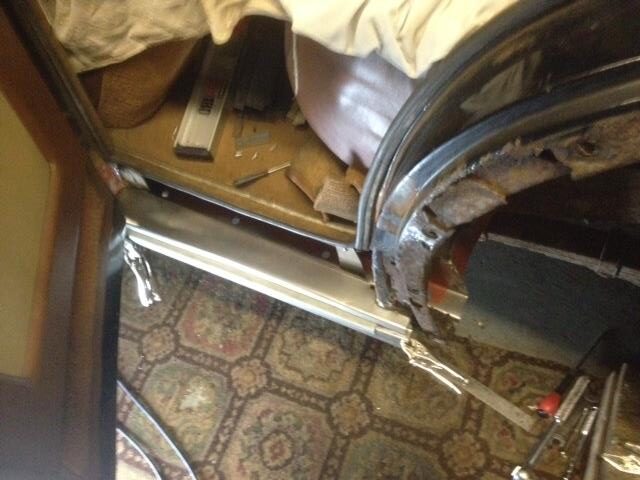
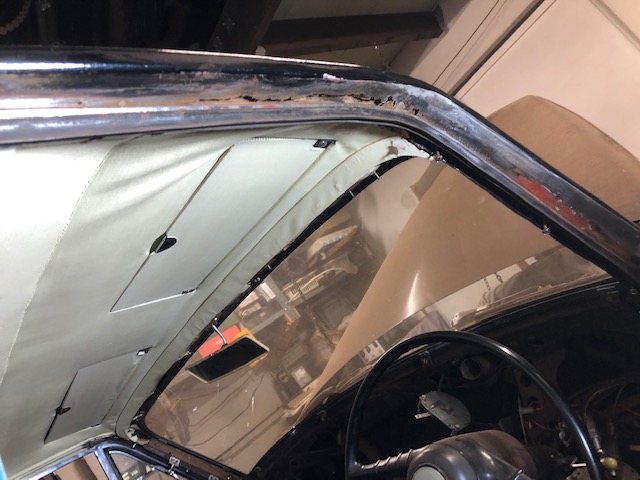
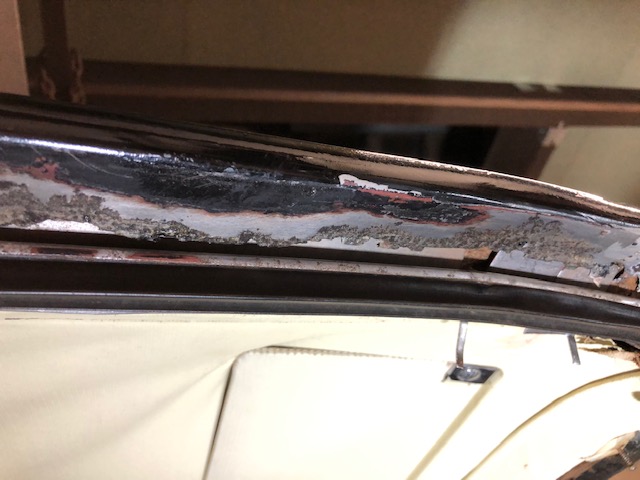
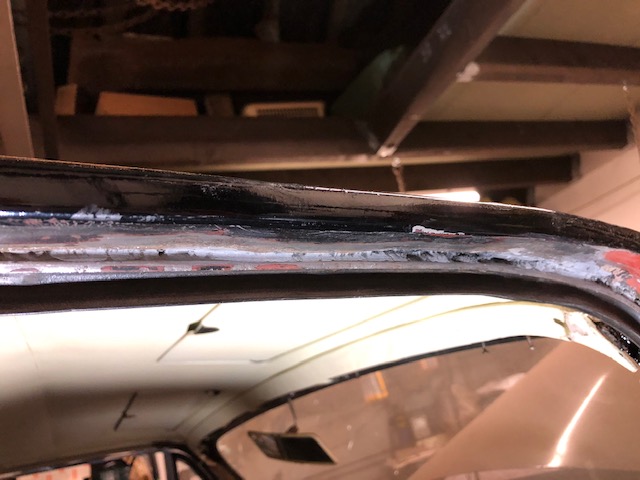
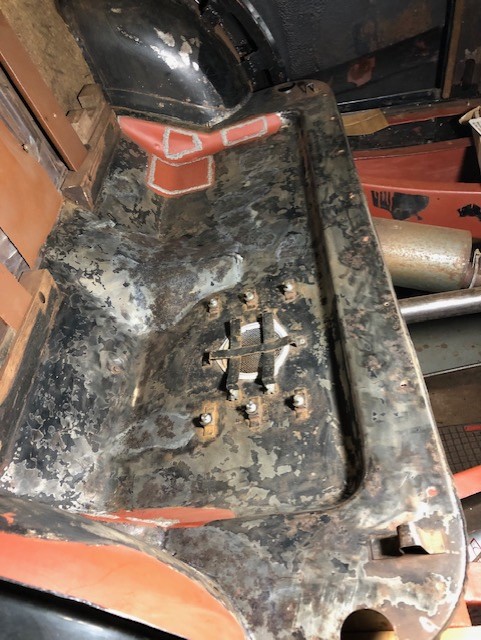
The year 2020 was rounded off with some rust repairs to the cant rail section (below the roof guttering) inside of the off side front door, which had rusted through in places (photo 1). Welding was not practical here, given the wood and the edge of the headlining lying behind the metal. The rusted metal was therefore removed, new metal screwed to the wood on the inside of the car (photo 2) and high quality chemical metal (JB Steelstick) used to join the old metal to the new (photo 3). Some welded repairs were also needed to the near side of the rear seat tub i.e. the section on which the base of the rear seat is located (photo 4).
2021 saw work begin on the doors, all of which required considerable repair work with new metal needed for the lower and bottom sections. The following photos of the near side rear door give an indication of the work needed.
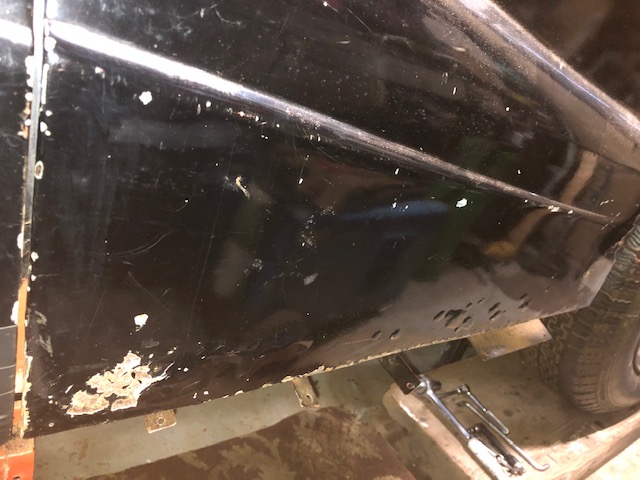

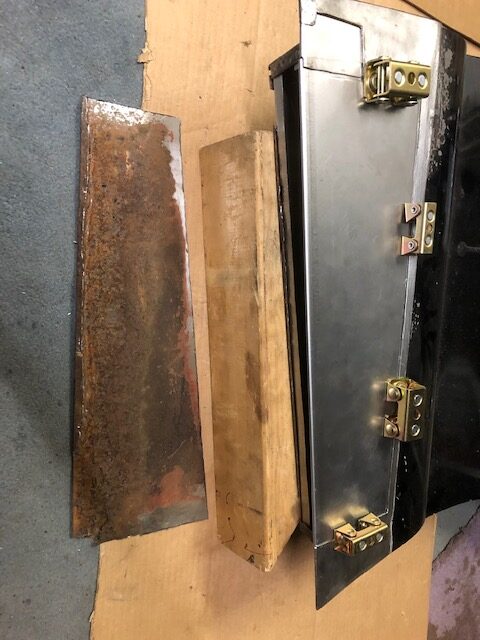
The inner and outer repair sections shown in the above two photos are temporarily fitted prior to welding. On the left of the second photo is the inside face of the section that has been cut out and replaced. Most of the sections were spot-welded to minimise distortion, with MIG welding only in places where there was insufficient access for spot welding. The photo below shows the outer section on the off side front door (photographed upside down …) with the lower repair section spot welded in along the length of the door with some MIG welding on the vertical joins at each end of the door.

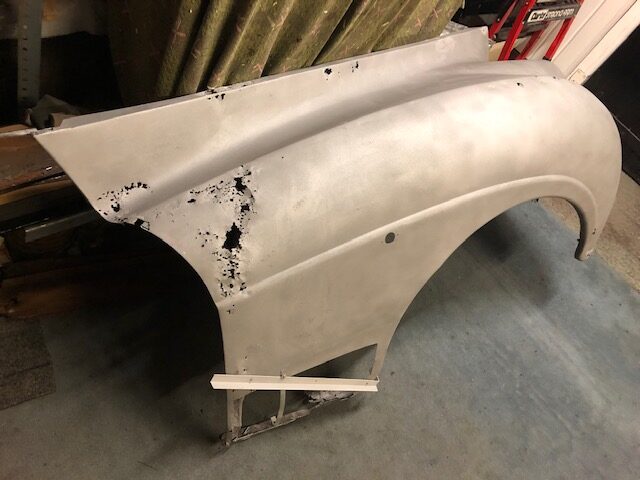
The outer front wings, which had been subjected to previous repairs at some time in the past, also required considerable repair work. Previous repairs to the off side front wing, largely consisting of lead loading and filler over the rusted sections (along with a crudely welded in lower section at the rear of the wheel arch) had not stood the test of time. The off side wing was sandblasted, which as can be seen in the photos below revealed quite a few sections with holes where repairs were needed. The areas with holes were cut back to good metal and new metal was welded in.

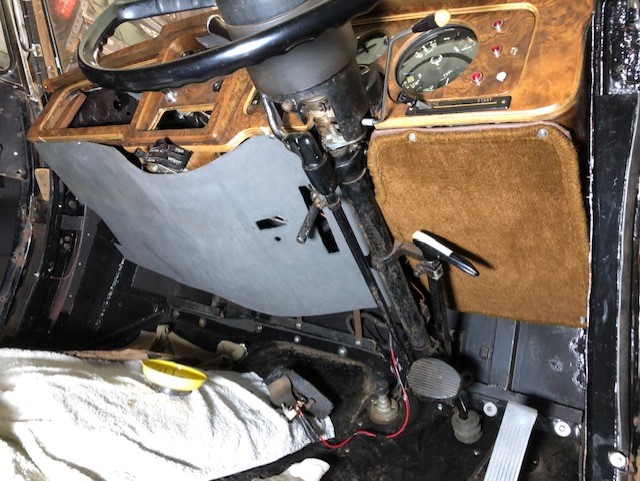
After lots of shaping of repair panels and welding them in place, now for something completely different – sorting out the underdash area below the dashboard and glove box! This was originally in a patterned beige-coloured millboard, with an upper and lower section joined by a horizontal metal strip painted in beige running the width of the car. Removing the millboard without tearing or having to cut it is difficult, if not impossible (not least because the lower section seems to have been fitted prior to the steering column …). As with my Sapphire 346, the millboard had been removed and torn before I acquired the car. Alan Fradley, who was a great source of help when I was restoring my Sapphire 346, had made templates for two carpeted millboard underdash sections (one either side of the steering column) which I used on my Sapphire and I have done the same for the Star. The photo below shows the two underdash sections on the Star, the carpet-covered smaller one to the right of the steering column and the larger one (awaiting carpeting) to the left.
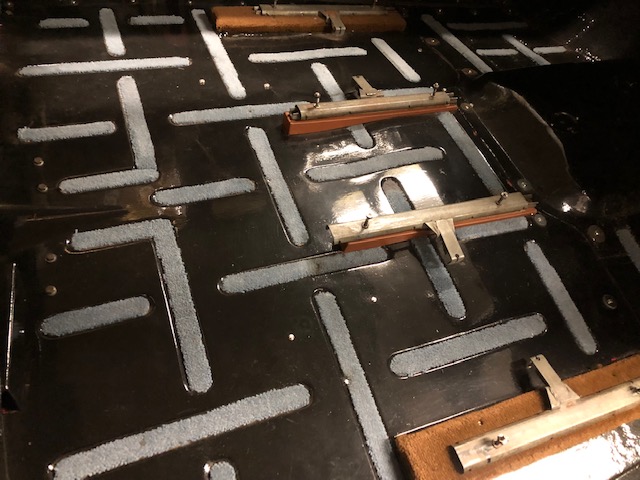
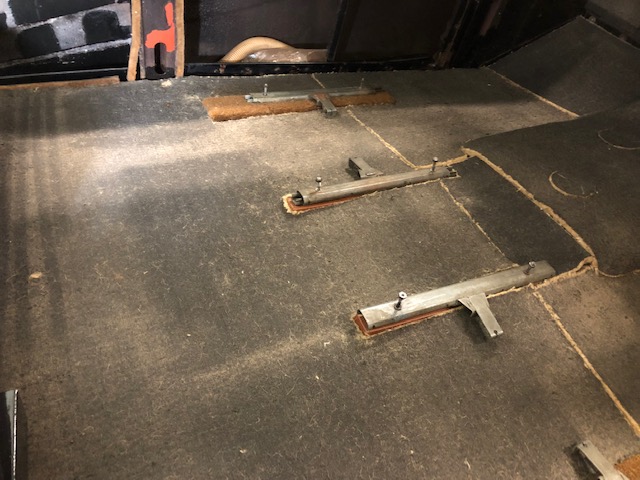
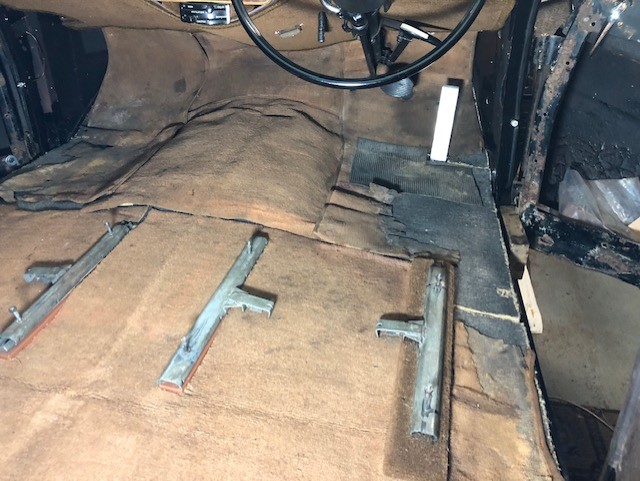
The beginning of 2022 saw the front and rear floor pressings refitted, with the indented (strengthening) sections filled with old blue (good quality) carpet glued in place to level up the floor surface. The factory had used a hessian type underlay to fill the indents when the car was new but, with deterioration, this had sunk below floor level and had in any event to be removed before sandblasting, metal repairs and painting. Using carpet to replace it has produced a nice flat surface for the underlay (left over from restoring my Sapphire 346 in the late 1980s to mid 1990s but still perfectly good to use!!) and for the new carpet sections when they are fitted. The colour description of the new carpet is tan which (as can be seen in the photos below where new carpet is on the wood sections under the outer seat runners) is a medium shade of brown. I think the colour description of the original carpet might also be tan, although, as seen in the third photo below where the original carpet is laid over the underlay, this is more orange in colour. As also seen, significant sections of the original carpet have disintegrated, notably in the front footwells!
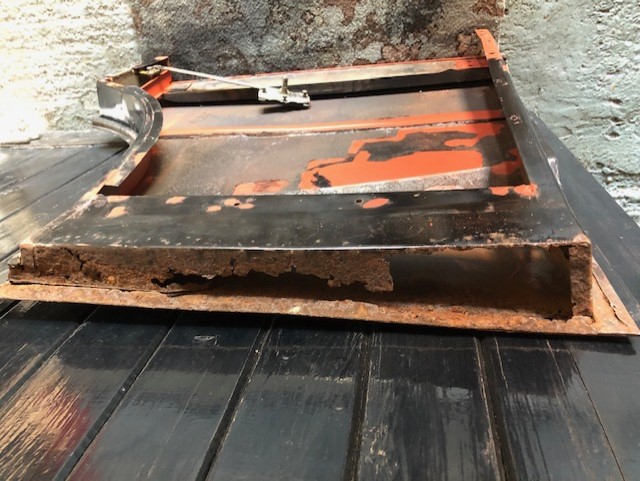
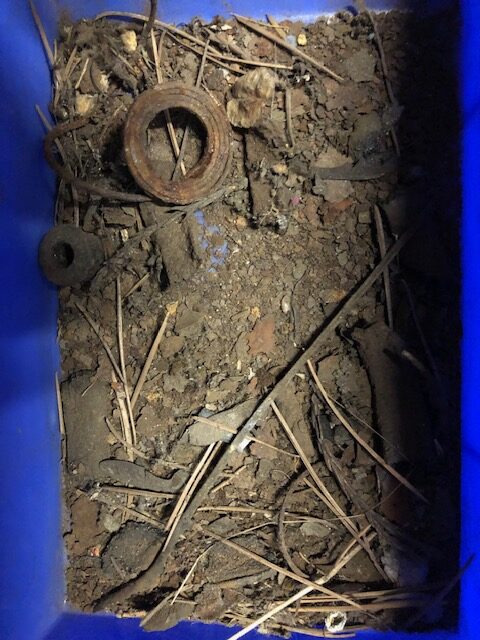
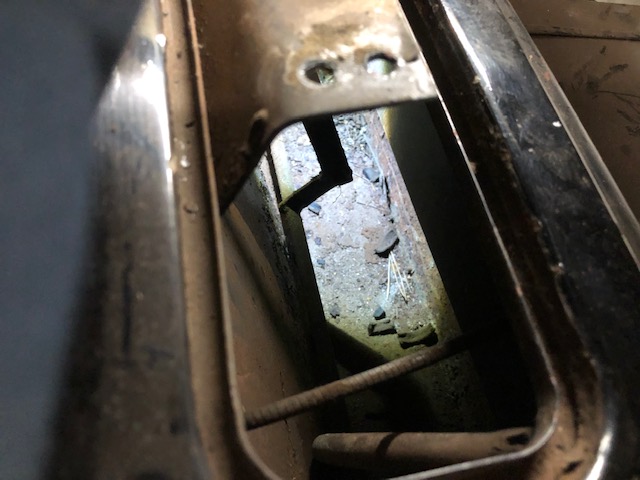
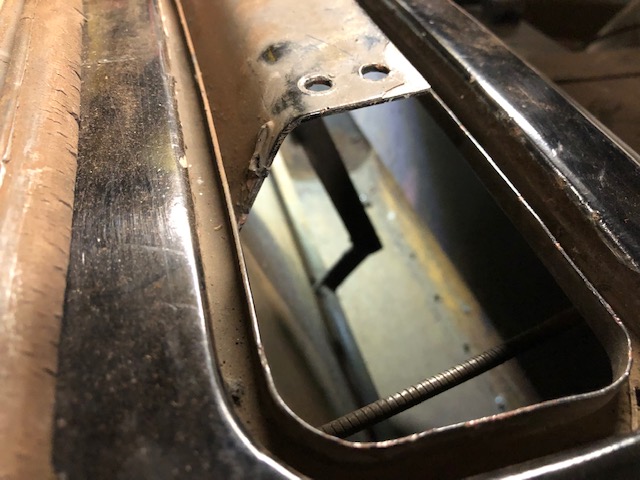
At the NEC Restoration Show in March 2022, after assisting Colin and Kevin Sheldon to remove the dashboard on their Star Sapphire, we decided to remove the air vent box cover on the scuttle to see what the inside of the air vent box was like. It was in good condition, although accumulated in the bottom was some debris which was removed. This prompted me to have a look inside my air vent box to see what condition it was in. This was similarly in good condition, albeit with a fair amount debris in the bottom including a coiled up strip of thick metal! The debris was removed (but not easily …) and placed in a 6″ x 4″ blue plastic storage box so it could be photographed before being disposed of. This is the first photo below. The second photo shows some but not all the debris removed and the third photo shows all of it removed. The surface rust on the lower part of the box was wire brushed to remove any loose rust (which was removed along with the other debris) and then the area was coated in Bilt Hamber Dynax UB Anti-Corrosion Wax. The disintegrating rubber drain tubes (the off-side one is visible at the bottom of the second photo) were also removed and replaced by new silicon tubing.
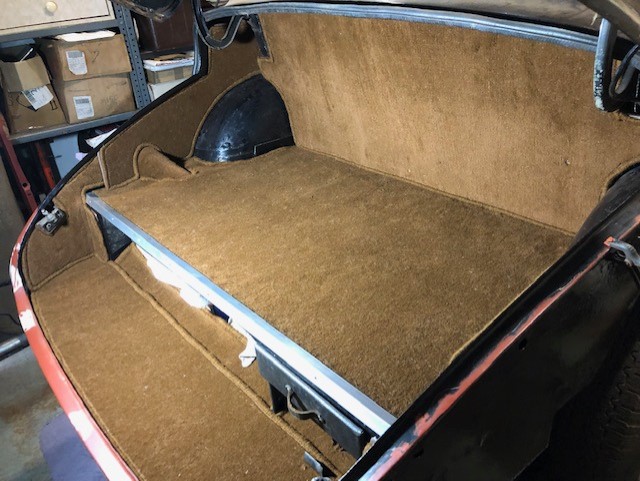
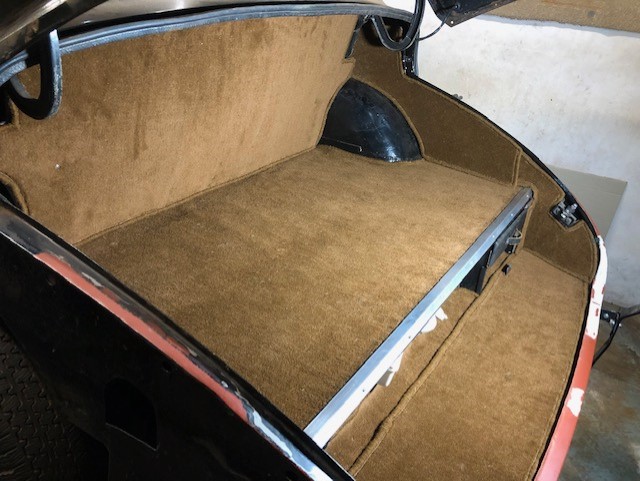
Work in the latter part of 2022 included time-consuming repairs to both front doors, which required similar work to the rear doors as covered above. Carpeted sections were also made for the boot, again using the Alan Fradley templates with which I had carpeted the boot on my Sapphire 346. The photos below show the carpeted sections in the Star, apart from the wheel arch covers which have still to be added.